ASSOCIATE-ANDROID-DEVELOPER Online Practice Questions and Answers
Questions 4
DRAG DROP
In a common Paging Library architecture scheme, move instances to the correct positions.
Select and Place:

Questions 5
Select correct demonstration of WorkRequest cancellation.
A. workManager.enqueue(OneTimeWorkRequest.Builder(FooWorker::class.java).build ())
B. val request: WorkRequest = OneTimeWorkRequest.Builder (FooWorker::class.java).build() workManager.enqueue(request) val status = workManager.getWorkInfoByIdLiveData(request.id) status.observe(...)
C. val request: WorkRequest = OneTimeWorkRequest.Builder (FooWorker::class.java).build() workManager.enqueue(request) workManager.cancelWorkById(request.id)
D. val request1: WorkRequest = OneTimeWorkRequest.Builder (FooWorker::class.java).build() val request2: WorkRequest = OneTimeWorkRequest.Builder (BarWorker::class.java).build() val request3: WorkRequest = OneTimeWorkRequest.Builder (BazWorker::class.java).build() workManager.beginWith(request1, request2).then(request3).enqueue()
E. val request: WorkRequest = OneTimeWorkRequest.Builder (FooWorker::class.java).build() workManager.enqueue(request) workManager.cancelWork(request)
Questions 6
Android Tests. You can use the childSelector() method to nest multiple UiSelector instances. For example, the following code example shows how your test might specify a search to find the first ListView in the currently displayed UI, then search within that ListView to find a UI element with the text property Apps. What is the correct sample?
A. val appItem: UiObject = device.findObject(
UiSelector().className(ListView.class)
.instance(1)
.childSelector(
UiSelector().text("Apps")
)
)
B. val appItem: UiObject = device.findObject(
UiSelector().className("android.widget.ListView")
.instance(0)
.childSelector(
UiSelector().text("Apps")
)
)
C. val appItem: UiObject = device.findObject(UiSelector().className("android.widget.ListView").instance(UiSelector().text("Apps")
)
)
Questions 7
For example, we have a file in our raw folder app/src/main/res/raw/sample_teas.json. To get an InputStream for reading it, from out Context context, we can do this:
A. val input = context!!.openRawResource(R.raw.sample_teas)
B. val input = context!!.getRawResource(R.raw.sample_teas)
C. val input = context!!.resources.openRawResource(R.raw.sample_teas)
Questions 8

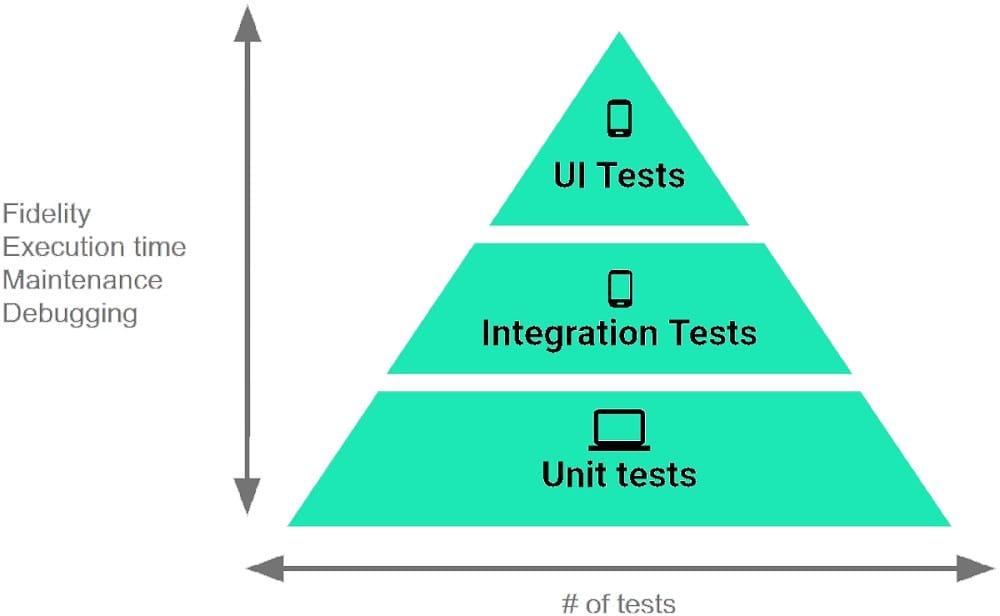
The Testing Pyramid, shown in the Figure, illustrates how your app should include the three categories of tests: small, medium, and large. Small tests are unit tests that :
A. validate your app's behavior one class at a time.
B. validate either interactions between levels of the stack within a module, or interactions between related modules.
C. validate user journeys spanning multiple modules of your app.
Questions 9
Filter logcat messages. If in the filter menu, a filter option "Edit Filter Configuration"? means:
A. Display the messages produced by the app code only (the default). Logcat filters the log messages using the PID of the active app.
B. Apply no filters. Logcat displays all log messages from the device, regardless of which process you selected.
C. Create or modify a custom filter. For example, you could create a filter to view log messages from two apps at the same time.
Questions 10
Enable debugging on your device: If you are using the emulator, this is enabled by default. But for a connected device, you need to
A. enable transfer data from the device in usb connection options.
B. enable debugging in the device developer options.
C. enable connection in bluetooth options.
Questions 11
By default, the notification's text content is truncated to fit one line. If you want your notification to be longer, for example, to create a larger text area, you can do it in this way:
A. NotificationCompat.Builder builder = new NotificationCompat.Builder(this, CHANNEL_ID).setContentText("Much longer text that cannot fit one line...").setStyle(new NotificationCompat.BigTextStyle()
.bigText("Much longer text that cannot fit one line..."))
...
B. NotificationCompat.Builder builder = new NotificationCompat.Builder(this, CHANNEL_ID).setContentText("Much longer text that cannot fit one line...")
.setLongText("Much longer text that cannot fit one line..."))
...
C. NotificationCompat.Builder builder = new NotificationCompat.Builder(this, CHANNEL_ID).setContentText("Much longer text that cannot fit one line...")
.setTheme(android.R.style.Theme_LongText);
...
Questions 12
To build a debug APK, you can open a command line and navigate to the root of your project directory. To initiate a debug build, invoke the assembleDebug task:
gradlew assembleDebug
This creates an APK named [module_name]-debug.apk in [project_name]/[module_name]/build/outputs/apk/
Select correct statements about generated file. (Choose all that apply.)
A. The file is already signed with the debug key
B. The file is already aligned with zipalign
C. You can immediately install this file on a device.
Questions 13
Working with Custom View. Once you define the custom attributes, you can use them in layout XML files just like built-in attributes. The only difference is that your custom attributes belong to a different namespace. Instead of belonging to the http://schemas.android.com/apk/res/android namespace, they belong to:
A. http://schemas.android.com/apk/res/[your package name]
B. http://schemas.android.com/apk/[your package name]
C. http://schemas.android.com/[your package name]

